Important
Traducerea este un efort al comunității, la care puteți să vă alăturați. În prezent, această pagină este tradusă 44.30%.
18.2. Lesson: Using DB Manager to work with Spatial Databases in QGIS
Am văzut deja cum se pot efectua în QGIS multe operații cu bazele de date, la fel de simplu ca și cu celelalte instrumente, dar acum este timpul să ne uităm la instrumentul DB Manager, care oferă o mare parte din aceeași funcționalitate, similar cu alte instrumente dedicate managementului.
Scopul acestei lecții: De a se învăța interacțiunea cu bazele de date raster, folosind interfața DB Manager din QGIS.
18.2.1. ★☆☆ Follow Along: Managing PostgreSQL Databases with DB Manager
You should first open the DB Manager interface by selecting
on the menu
or by selecting the  DB Manager icon on the toolbar.
You should already see the previous connections we have configured
and be able to expand the myPG section and its public schema
to see the tables we have worked with in previous sections.
Primul lucru care se remarcă este faptul că, de acum, puteți vedea unele metadate ale Schemelor conținute în baza de date.
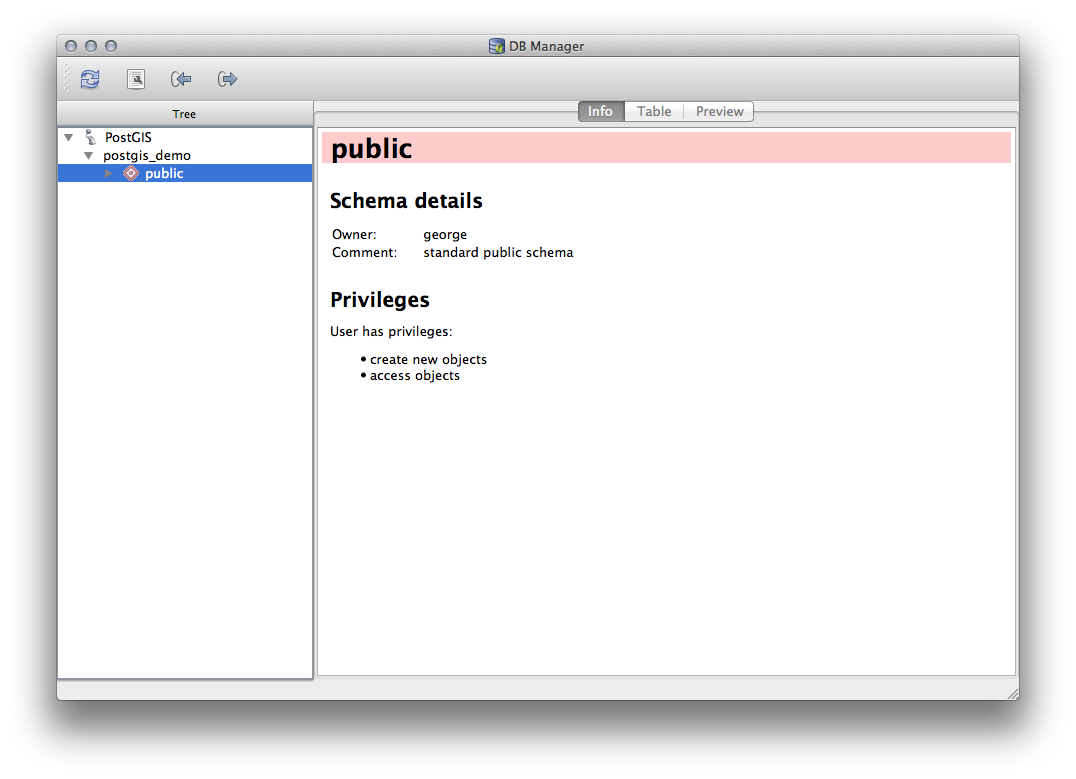
Schemas are a way of grouping data tables and other objects in a PostgreSQL database and a container for permissions and other constraints. Managing PostgreSQL schemas is beyond the scope of this manual, but you can find more information about them in the PostgreSQL documentation on Schemas. You can use the DB Manager to create new Schemas, but will need to use a tool like pgAdmin III or the command line interface to manage them effectively.
De asemenea, DB Manager se poate folosi pentru a administra tabelele din baza de date. Am analizat deja diferite moduri de creare și gestionare a tabelelor din linia de comandă, dar acum dorim să vedem cum se poate face acest lucru în DB Manager.
First, its useful to just look at a table’s metadata by clicking on its name in tree and looking in the Info tab.
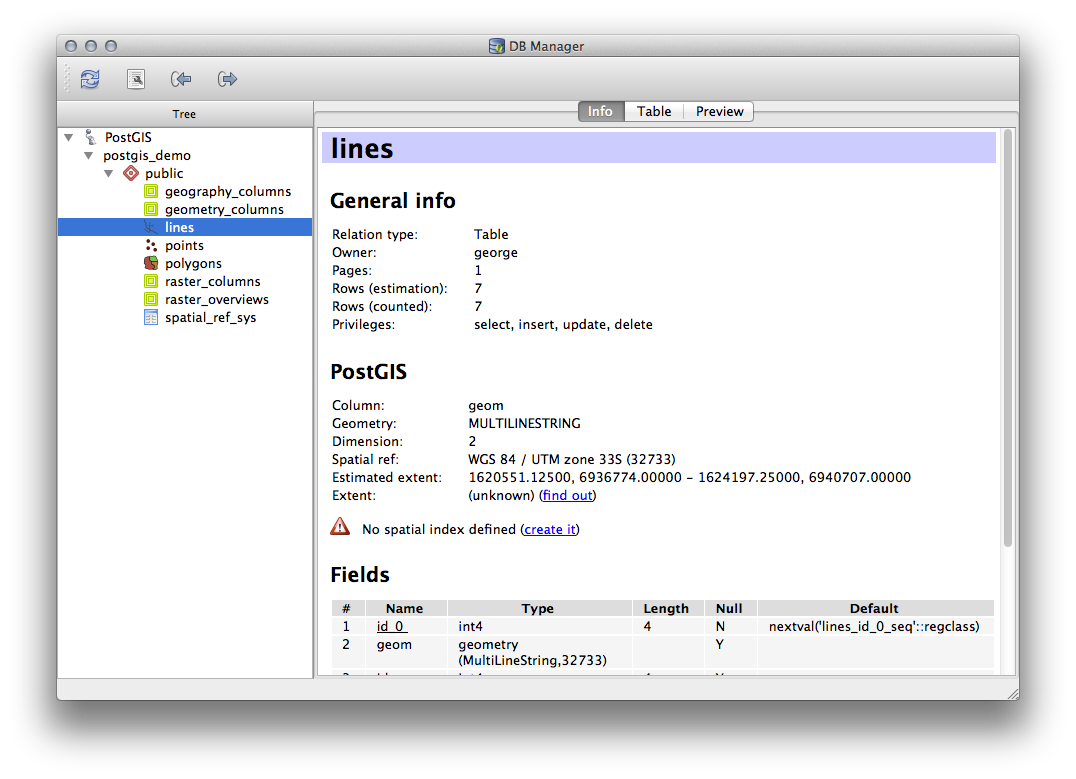
In this panel you can see the General Info about the table as well the information that the PostGIS extension maintains about the geometry and spatial reference system.
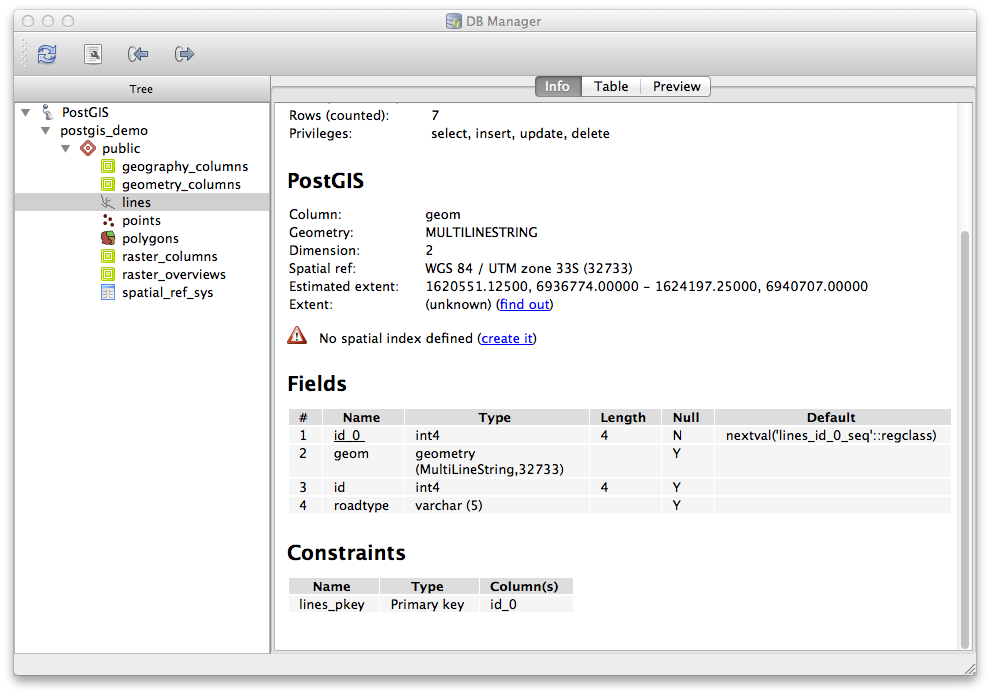
If you scroll down in the Info tab, you can see more information about the Fields, Constraints and Indexes for the table you are viewing.
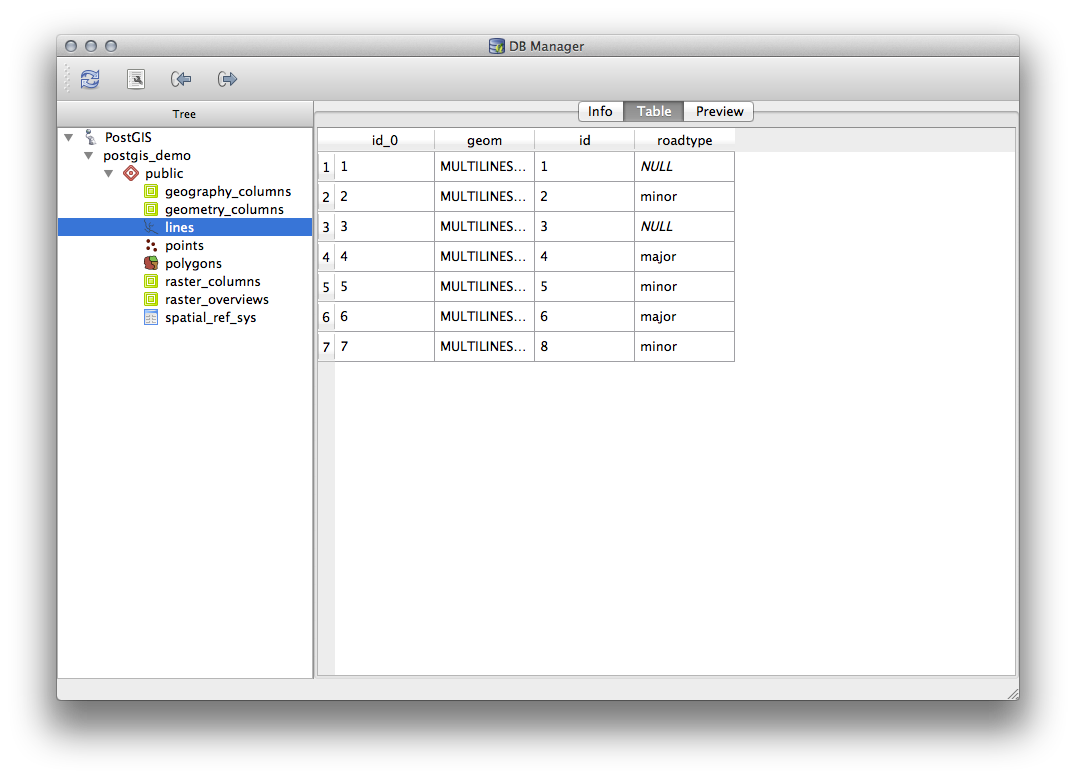
Its also very useful to use DB Manager to simply look at the records in the database in much the same way you might do this by viewing the attribute table of a layer in the Layer Tree. You can browse the data by selecting the Table tab.
Există, de asemenea o filă Preview, care vă va arăta datele stratului într-o hartă de previzualizare.
Click-dreapta pe unul dintre straturi și, făcând clic pe Add to Canvas, acesta se va adăuga pe hartă.
So far we have only been viewing the database its schemas and tables and their metadata, but what if we wanted to alter the table to add an additional column perhaps? DB Manager allows you to do this directly.
Selectați din arbore tabela pe care doriți să o editați
Select from the menu, to open the Table Properties dialog.
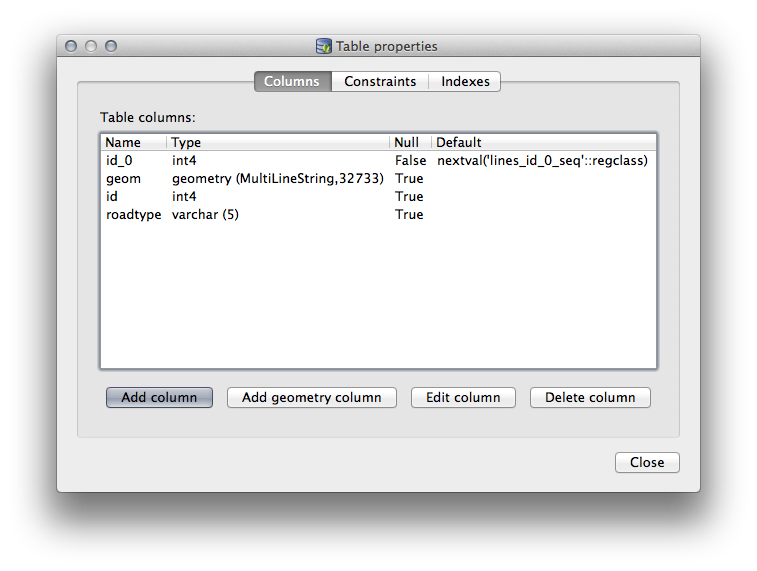
Puteți folosi acest dialog pentru a Adăuga Coloane, Coloane pentru geometrii, pentru a edita coloanele existente sau pentru a elimina complet o coloană.
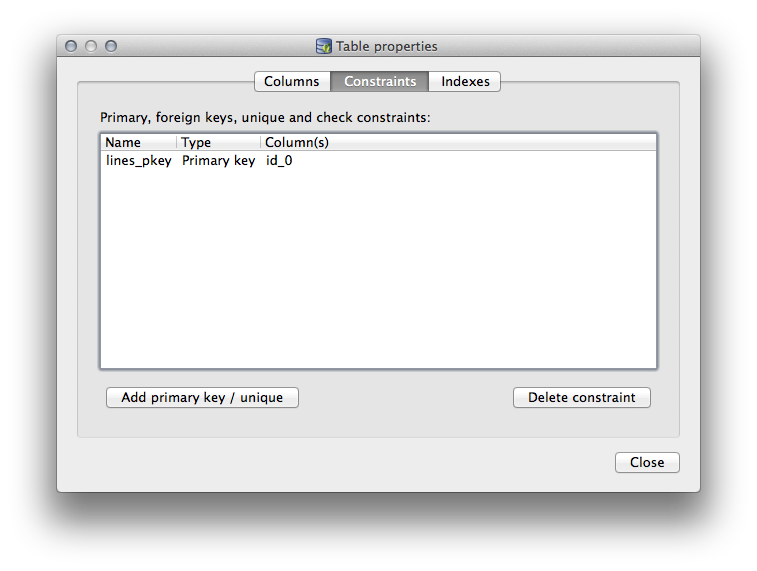
Using the Constraints tab, you can manage which fields are used as the primary key or to drop existing constraints.
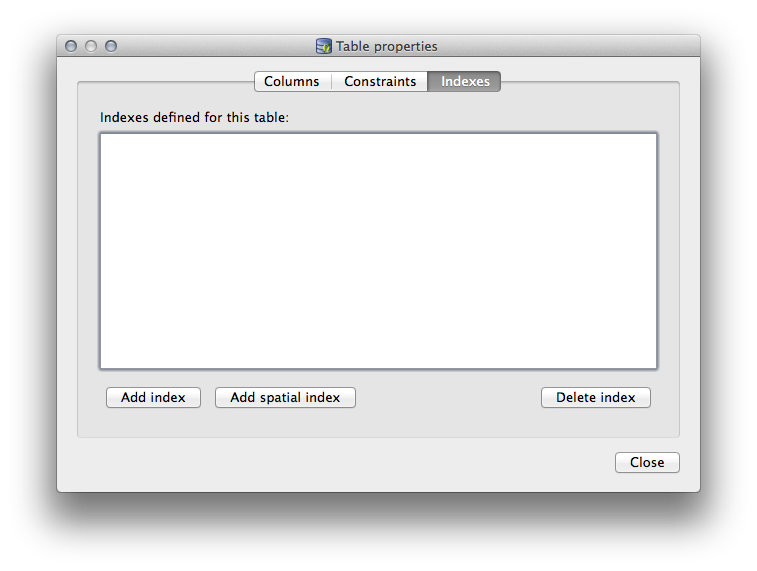
Fila Indecșilor poate fi folosită pentru a adăuga și șterge atât indicii spațiali, cât și cei normali.
18.2.2. ★☆☆ Follow Along: Creating a New Table
Acum, că am trecut prin procesul de lucru cu tabelele existente în baza noastră de date, haideți să folosim DB Manager pentru a crea o nouă tabelă.
If it is not already open, open the DB Manager window, and expand the tree until you see the list of tables already in your database.
Selectați meniul :guilabel:`Table –> Create Table`pentru a deschide dialogul de Creare a Tabelei.
Use the default
Publicschema and name the tableplaces.Add the
id,place_name, andelevationfields as shown belowMake sure the
idfield is set as the primary key.Click the checkbox to Create geometry column and make sure it is set to a
POINTtype and leave it namedgeomand specify4326as the SRID.Faceți clic pe caseta de bifare de Creare a indexului spațial, apoi pe Create pentru a crea tabela.

Închideți dialogul care vă informează că tabela s-a creat cu succes, apoi faceți clic pe Close pentru a închide Dialogul de Creare a Tabelei.
You can now inspect your table in the DB Manager and you will of course find that there is no data in it. From here you can Toggle Editing on the layer menu and begin to add places to your table.
18.2.3. ★☆☆ Follow Along: Basic Database Administration
The DB Manager will also let you do some basic database administration tasks. It is certainly not a substitute for a more complete database administration tool, but it does provide some functionality that you can use to maintain your database.
Database tables can often become quite large and tables which are being modified frequently can end up leaving around remnants of records that are no longer needed by PostgreSQL. The VACUUM command takes care of doing a kind of garbage collection to compact and optional analyze your tables for better performance.
Let us take a look at how we can perform a VACUUM ANALYZE command from within DB Manager.
Select one of your tables in the DB Manager Tree
Select from the menu
PostgreSQL will now perform the operation. Depending on how big your table is, this may take some time to complete.
You can find more information about the VACUUM ANALYZE process in the PostgreSQL Documentation on VACUUM ANALYZE.
18.2.4. ★☆☆ Follow Along: Executing SQL Queries with DB Manager
DB Manager also provides a way for you to write queries against your database tables and to view the results. We have already seen this type of functionality in the Browser panel, but lets look at it again here with DB Manager.
Select the
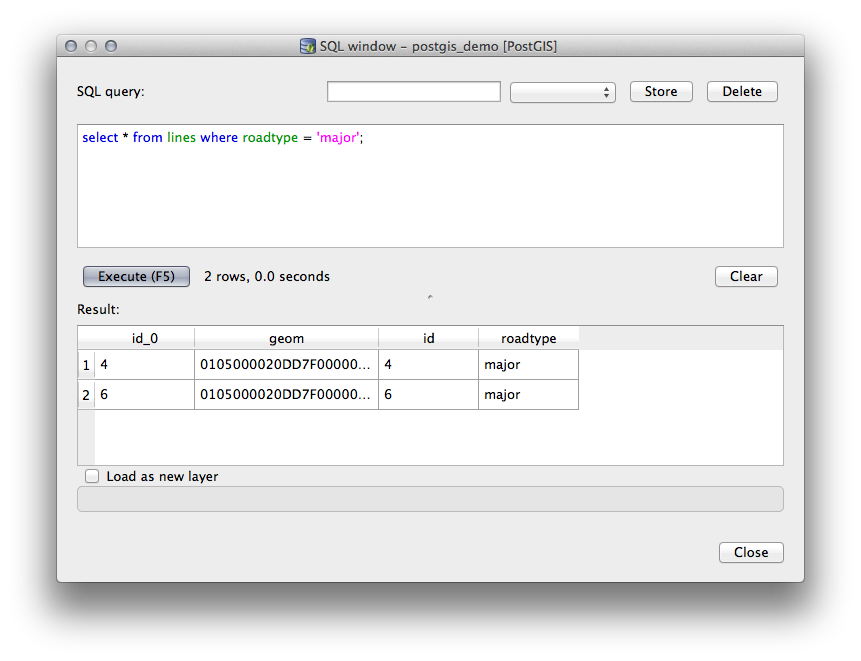
linestable in the tree.Selectați butonul SQL window din bara de instrumente DB Manager.

Compuneți următoarea Interogare SQL în spațiul furnizat:
select * from lines where roadtype = 'major';
Clic pe butonul Execute (F5) pentru a rula interogarea.
Ar trebui să vedeți acum înregistrările care corespund panoului Rezultate.
Faceți clic pe caseta de bifare Load as new layer pentru a adăuga rezultatele în harta dvs.
Select the
idcolumn as the Column with unique integer values and thegeomcolumn as the Geometry column.Enter
roads_primaryas the Layer name (prefix).Faceți clic pe Load now! pentru a încărca rezultatele ca un nou strat în harta dvs.
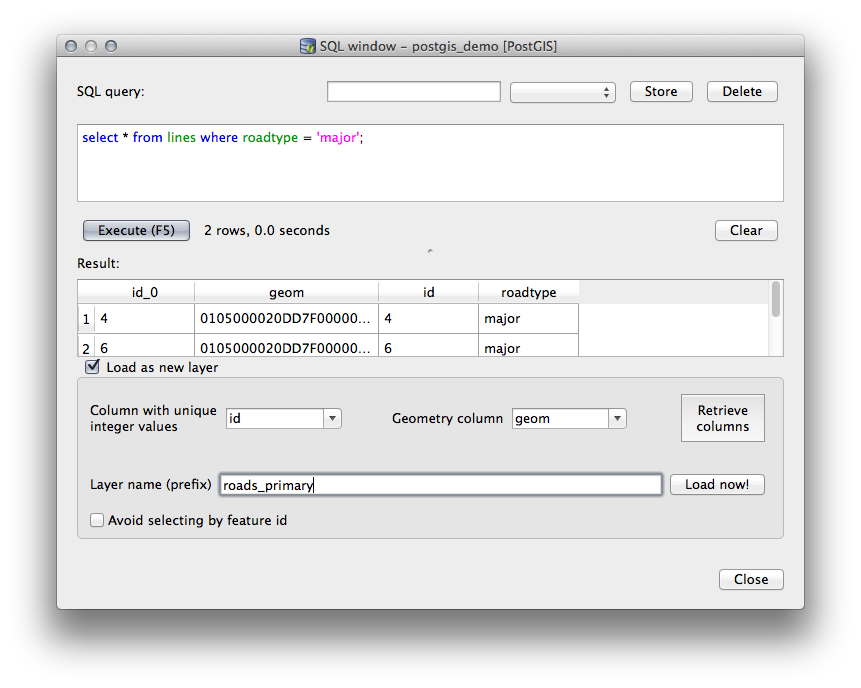
The layers that matched your query are now displayed on your map. You can of course use this query tool to execute any arbitrary SQL command including many of the ones we looked at in previous modules and sections.
18.2.5. Importarea datelor dintr-o Bază de date cu ajutorul DB Manager
We have already looked at how to import data into a spatial database using command line tools, so now let’s learn how to use DB Manager to do imports.
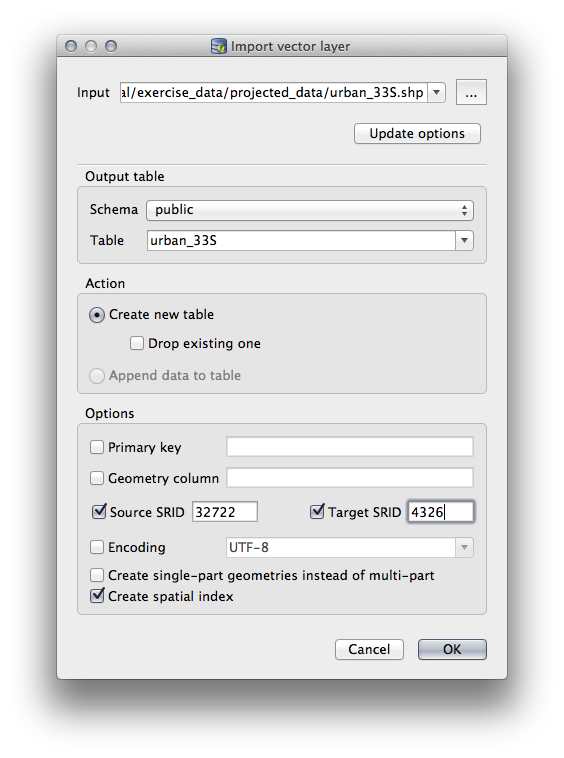
Clic pe butonul Import layer/file din Bara de Instrumente a dialogului DB Manager.

Select the
urban_33S.shpfile fromexercise_data/projected_dataas the input datasetClic pe butonul Opțiunilor de actualizare pentru a pre-completa unele din valorile formularului.
Asigurați-vă că este selectată opțiunea Creare tabelă nouă.
Specify the Source SRID as
32722and the Target SRID as4326Activați caseta de bifare pentru a Crea îndexul Spațial
Click OK to perform the import
Închideți dialogul care vă informează că importul a avut loc cu succes
Click the Refresh button on the DB Manager Toolbar
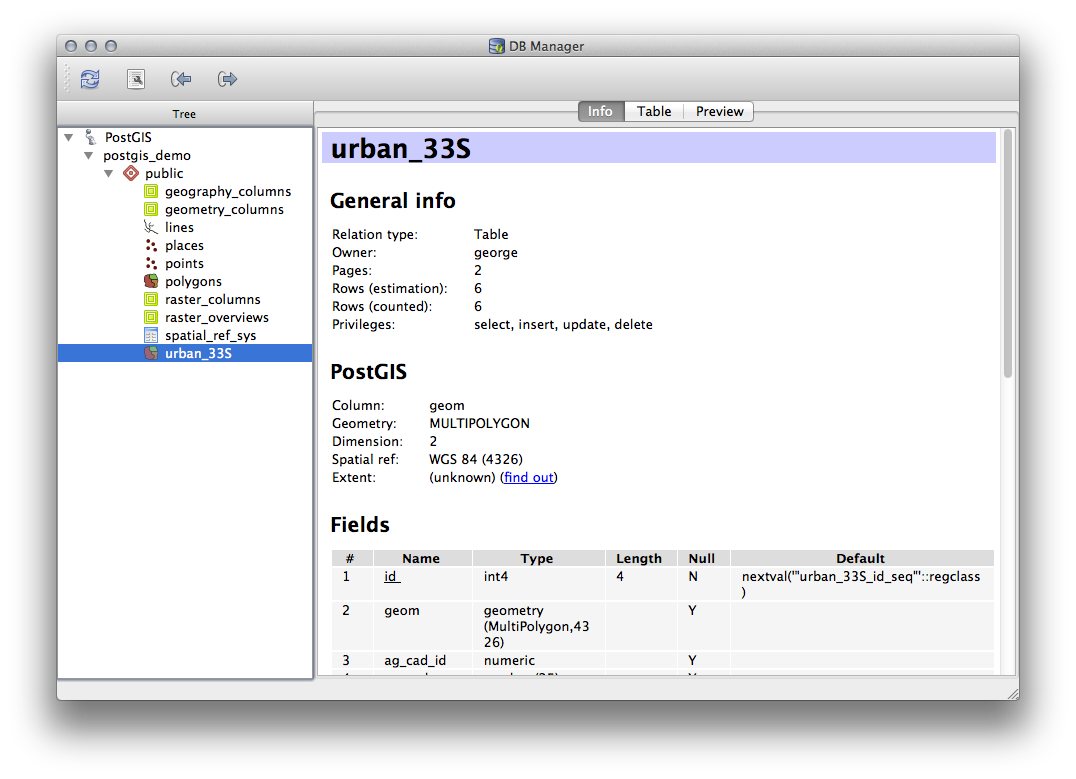
You can now inspect the table in your database by clicking on it in
the Tree.
Verify that the data has been reprojected by checking that the
Spatial ref: is listed as WGS 84 (4326).
Click-dreapta pe unul dintre straturile din Arbore și apoi, făcând clic pe Adăugare la Canevas, tabela se va adăuga pe hartă, sub formă de strat.
18.2.6. Exportul datelor cu DB Manager dintr-o Bază de date
De asemenea, DB Manager se poate utiliza pentru exportul datelor din bazele de date spațiale, așa că haideți să aruncăm o privire la modul în care se face aceasta.
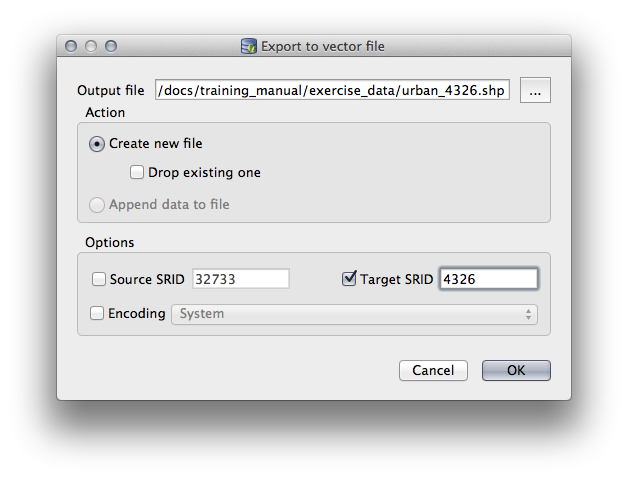
Select the
lineslayer in the Tree and click the Export to File button on the toolbar to open the Export to vector file dialog.Click the … button to select the Output file and save the data to your
exercise_datadirectory asurban_4326.Set the Target SRID as
4326.Clic OK pentru a inițializa exportul.
Închideți dialogul care vă informează că exportul a avut loc cu succes, apoi închideți DB Manager.
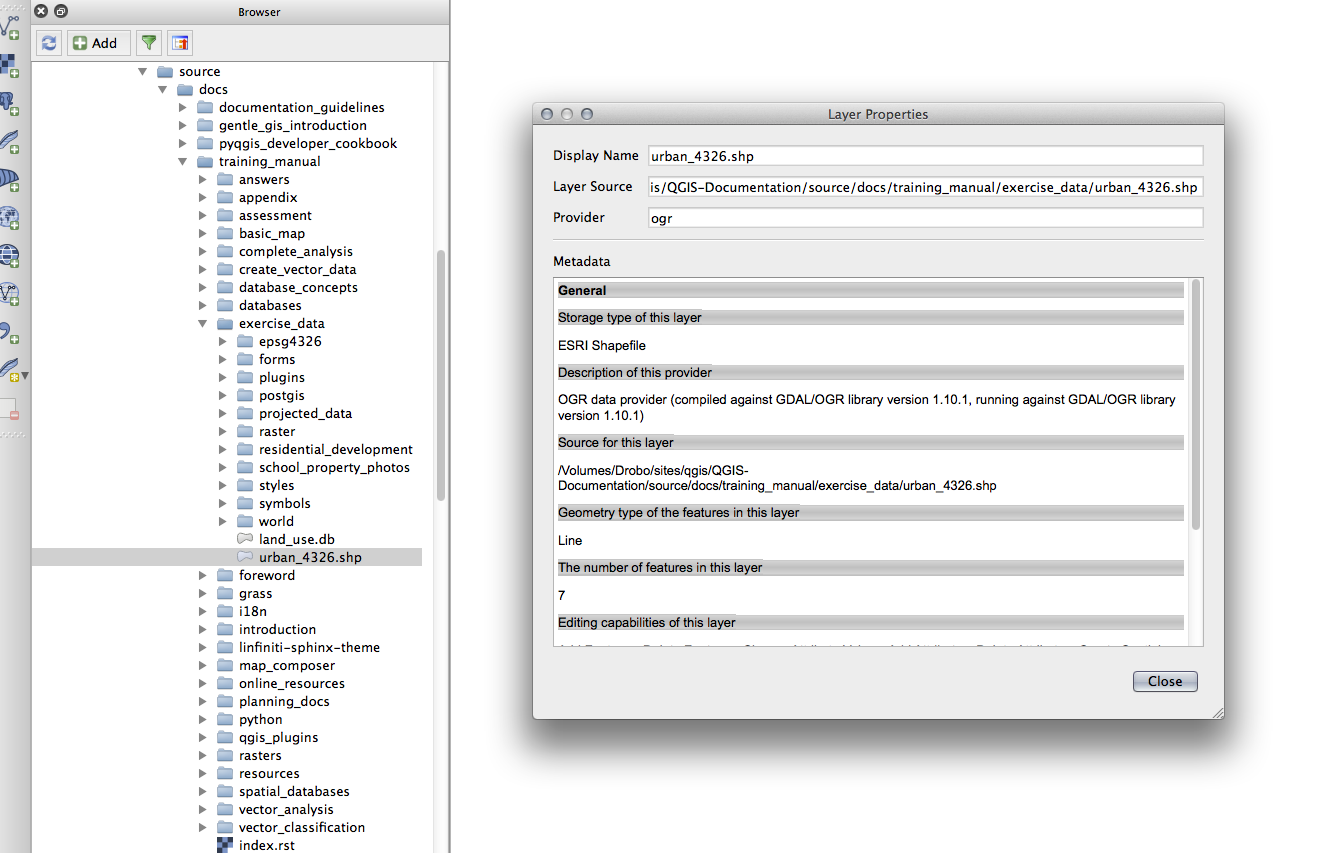
Puteți inspecta de acum fișierul shape pe care l-ați creat cu panoul de Răsfoire.
18.2.7. În concluzie
You have now seen how to use the DB Manager interface in QGIS to manage your spatial databases, to execute SQL queries against your data and how to import and export data.
18.2.8. Ce urmează?
Next, we will look at how to use many of these same techniques with SpatiaLite databases.