` `
Módulo de Captura de Coordenadas
O módulo de captura de coordenadas é de uso fácil e fornece a habilidade de exibir as coordenadas no enquadramento do mapa em dois Sistema de Referência de Coordenadas (SRC) seleccionados.
Módulo de Captura de Coordenadas
- Start QGIS, select
 Project Properties from the
Settings (KDE, Windows) or File (Gnome, macOS) menu
and click on the Projection tab. As an alternative, you can also
click on the
Project Properties from the
Settings (KDE, Windows) or File (Gnome, macOS) menu
and click on the Projection tab. As an alternative, you can also
click on the  CRS status icon in the lower
right-hand corner of the status bar.
CRS status icon in the lower
right-hand corner of the status bar. Clique na caixa de verificação
 Activar projecção “on the fly” e seleccione o sistema de coordenadas projectado à sua escolha (veja também Trabalhando com Projecções).
- Activate the coordinate capture plugin in the Plugin Manager (see
The Plugins Dialog) and ensure that the dialog is visible by going to
View ‣ Panels and ensuring that
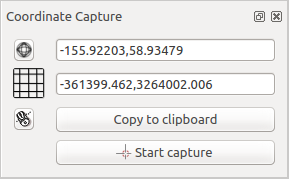
Coordinate Capture is enabled. The coordinate capture dialog
appears as shown in Figure figure_coordinate_capture. Alternatively,
you can also go to Vector ‣ Coordinate Capture and see
if Coordinate Capture is enabled.
Clique no ícone
 Clique para seleccionar o SRC para a exibição de coordenadas e seleccione um SRC diferente a partir do que seleccionou acima.
- To start capturing coordinates, click on [Start capture]. You can now click anywhere on the map canvas and the plugin will show the coordinates for both of your selected CRS.
Para activar o rastreio das coordenadas do rato clique no ícone
 rastreio do rato.
Pode também copiar as coordenadas seleccionadas para a área de trasnferência.