13.1. Lesson: GRASS instellen
Using GRASS in QGIS requires you to think of the interface in a slightly different way. Remember that you’re not working in QGIS directly, but working in GRASS via QGIS.
Het doel voor deze les: Een project in GRASS beginnen in QGIS.
13.1.1.  Follow Along: Een nieuw project in GRASS beginnen
To launch GRASS from within QGIS, you need to activate it as with any other plugin. First, open a new QGIS project.
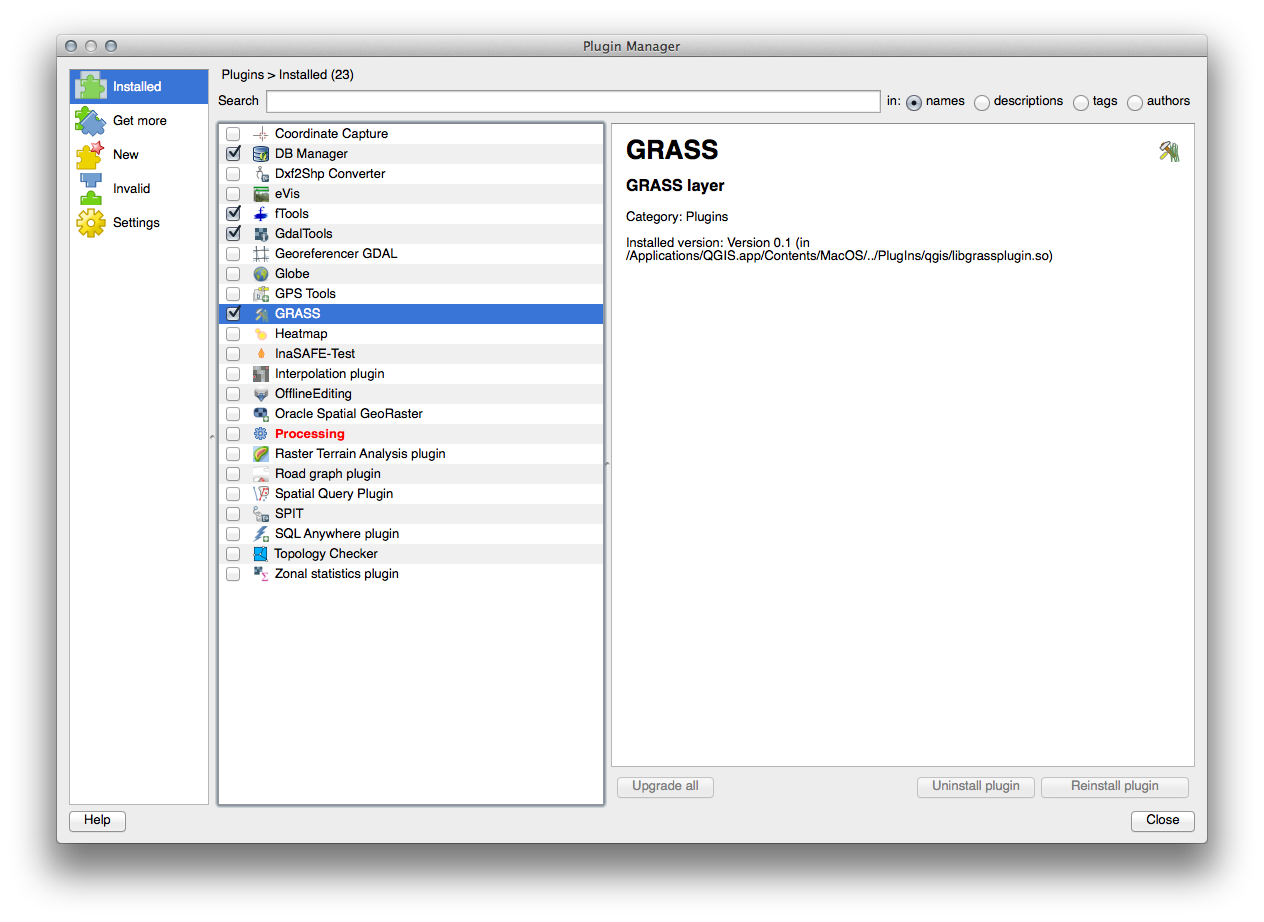
Schakel, in de Plug-in Manager, GRASS in in de lijst:
The GRASS toolbar will appear:

Before you can use GRASS, you need to create a mapset. GRASS always works in a database environment, which means that you need to import all the data you want to use into a GRASS database.
Click on the New mapset button:

You’ll see a dialog explaining the structure of a GRASS mapset.
Create a new directory called grass_db in exercise_data.
Stel het in als de map die door GRASS zal worden gebruikt om de database ervan in te stellen:
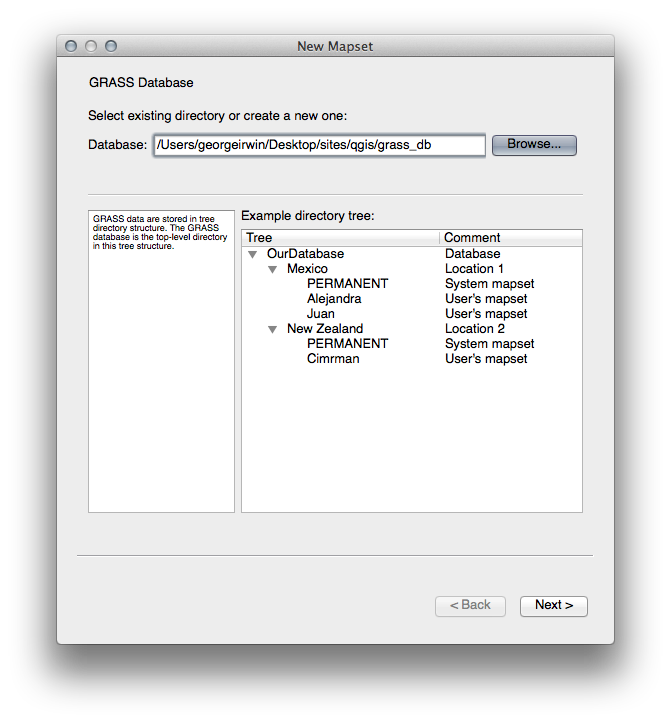
Klik op Next.
GRASS needs to create a “location”, which describes the maximum extents of the geographic area you’ll be working in.
Call the new location South_Africa:
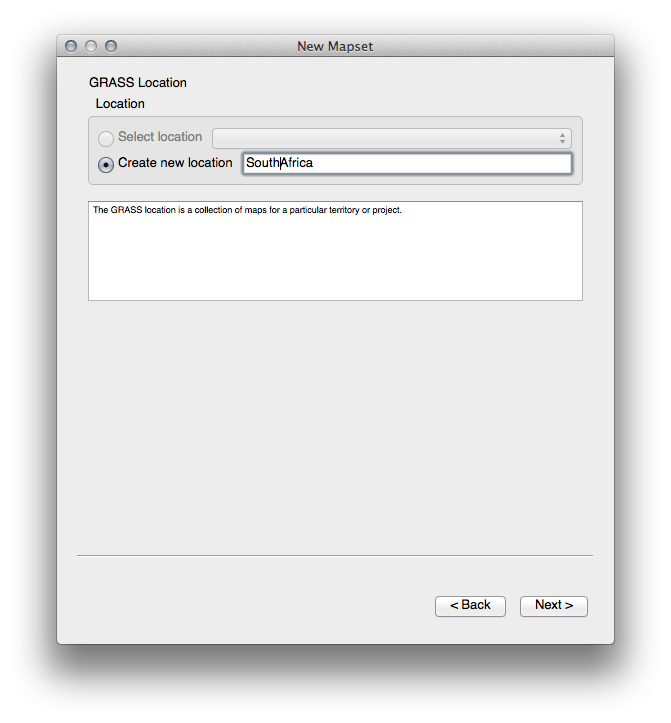
Klik op Next.
We’ll be working with WGS 84, so search for and select this CRS:

Klik op Next.
Selecteer nu de regio South Africa uit de keuzelijst en klik op Toepassen:

Klik op Next.
Maak een mapset, wat het bestand met kaarten is waarmee u zult werken.
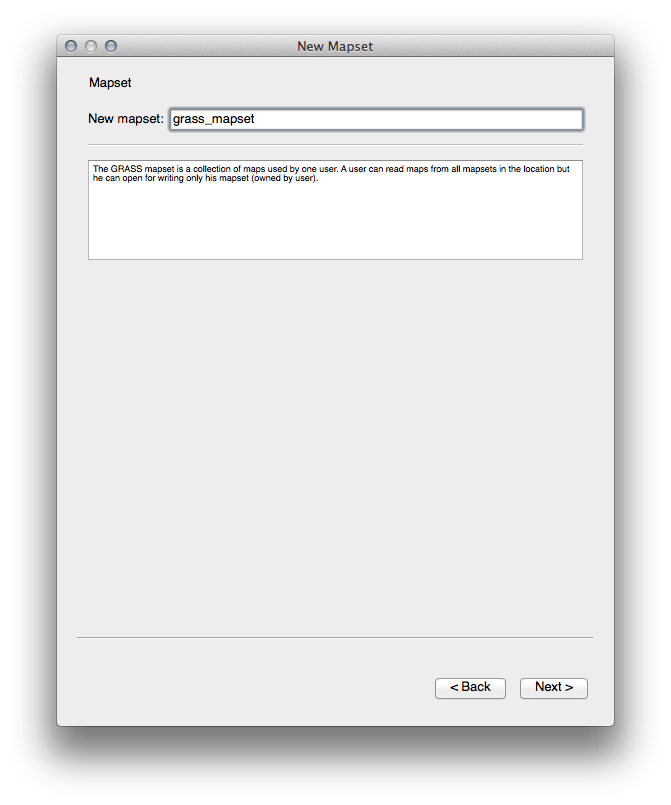
Once you’re done, you’ll see a dialog asking you to confirm that the settings it displays are correct.
Klik op Finish.
Klik op OK in het dialoogvenster.
13.1.2. Follow Along: Vectorgegevens in GRASS laden
You’ll now have a blank map. To load data into GRASS, you need to follow a two-step process.
Load data into QGIS as usual. Use the roads.shp dataset (found under exercise_data/epsg4326/) for now.
As soon as it’s loaded, click on the GRASS Tools button:

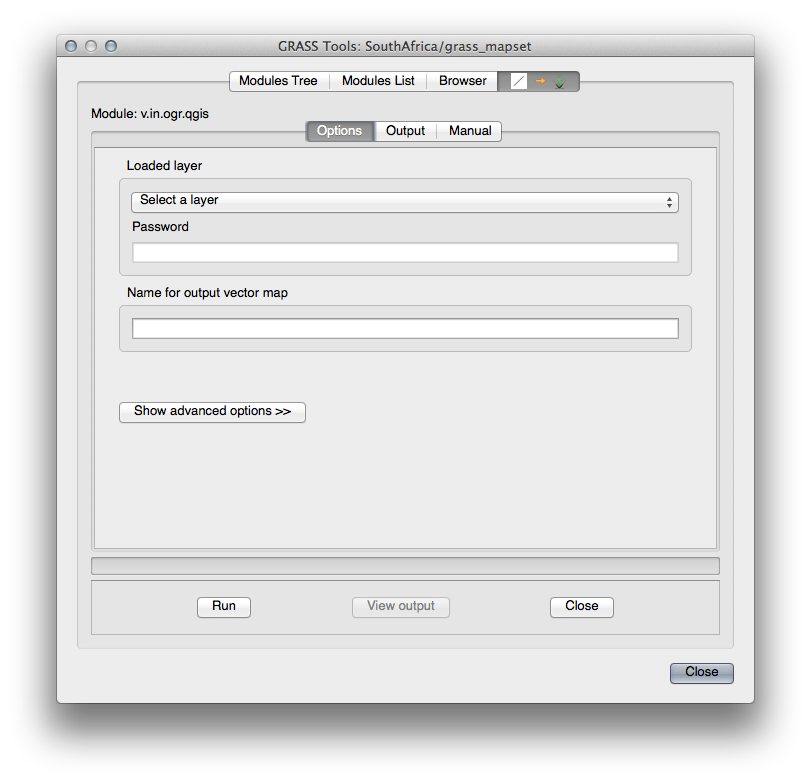
In the new dialog, select Modules list.
Find the vector import tool by entering the term v.in.ogr.qgis in the Filter field.
The v stands for “vector”, in means its a function to import data into the GRASS database, ogr is the software library used to read vector data, and qgis means that the tool will look for a vector from among the vectors already loaded into QGIS.
Once you’ve found this tool, click on it to bring up the tool itself:
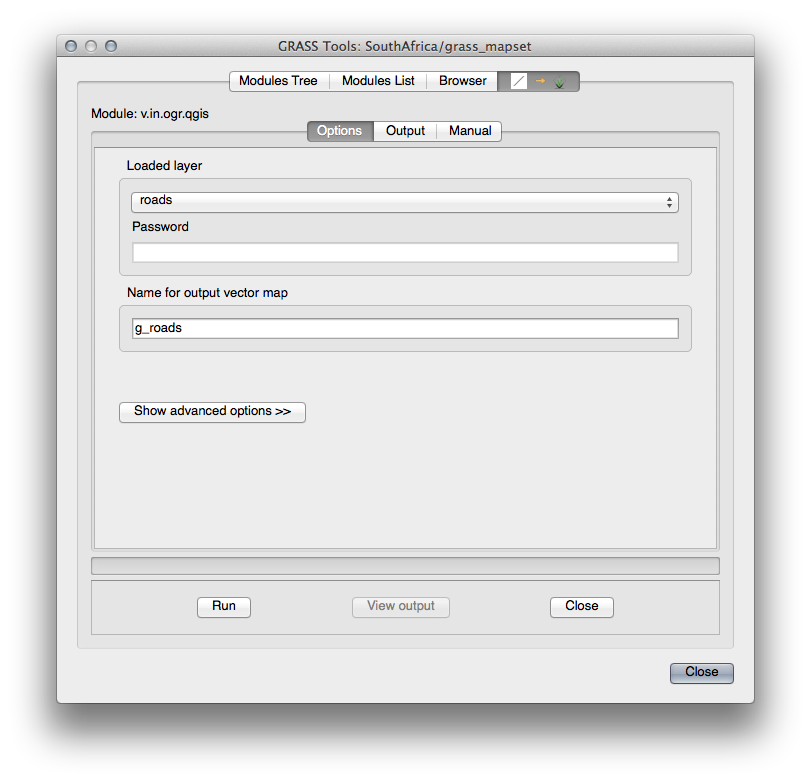
Set the loaded layer to roads and its GRASS version’s name to g_roads to prevent confusion.
Notitie
 Let op de extra opties voor importeren die worden verschaft onder Geavanceerde opties tonen. Deze omvatten de mogelijkheid om een clausule WHERE toe te voegen aan de SQL-query die wordt gebruikt voor het importeren van de gegevens.
Klik op Uitvoeren om het importeren te starten.
Klik, als het voltooid is, op de knop Uitvoer bekijken om de nieuw geïmporteerde laag voor GRASS in de kaart te bekijken.
Sluit eerst het gereedschap voor het importeren (klik op de knop Close direct rechts naast Uitvoer bekijken), en sluit het venster GRASS-gereedschap.
- Remove the original roads layer.
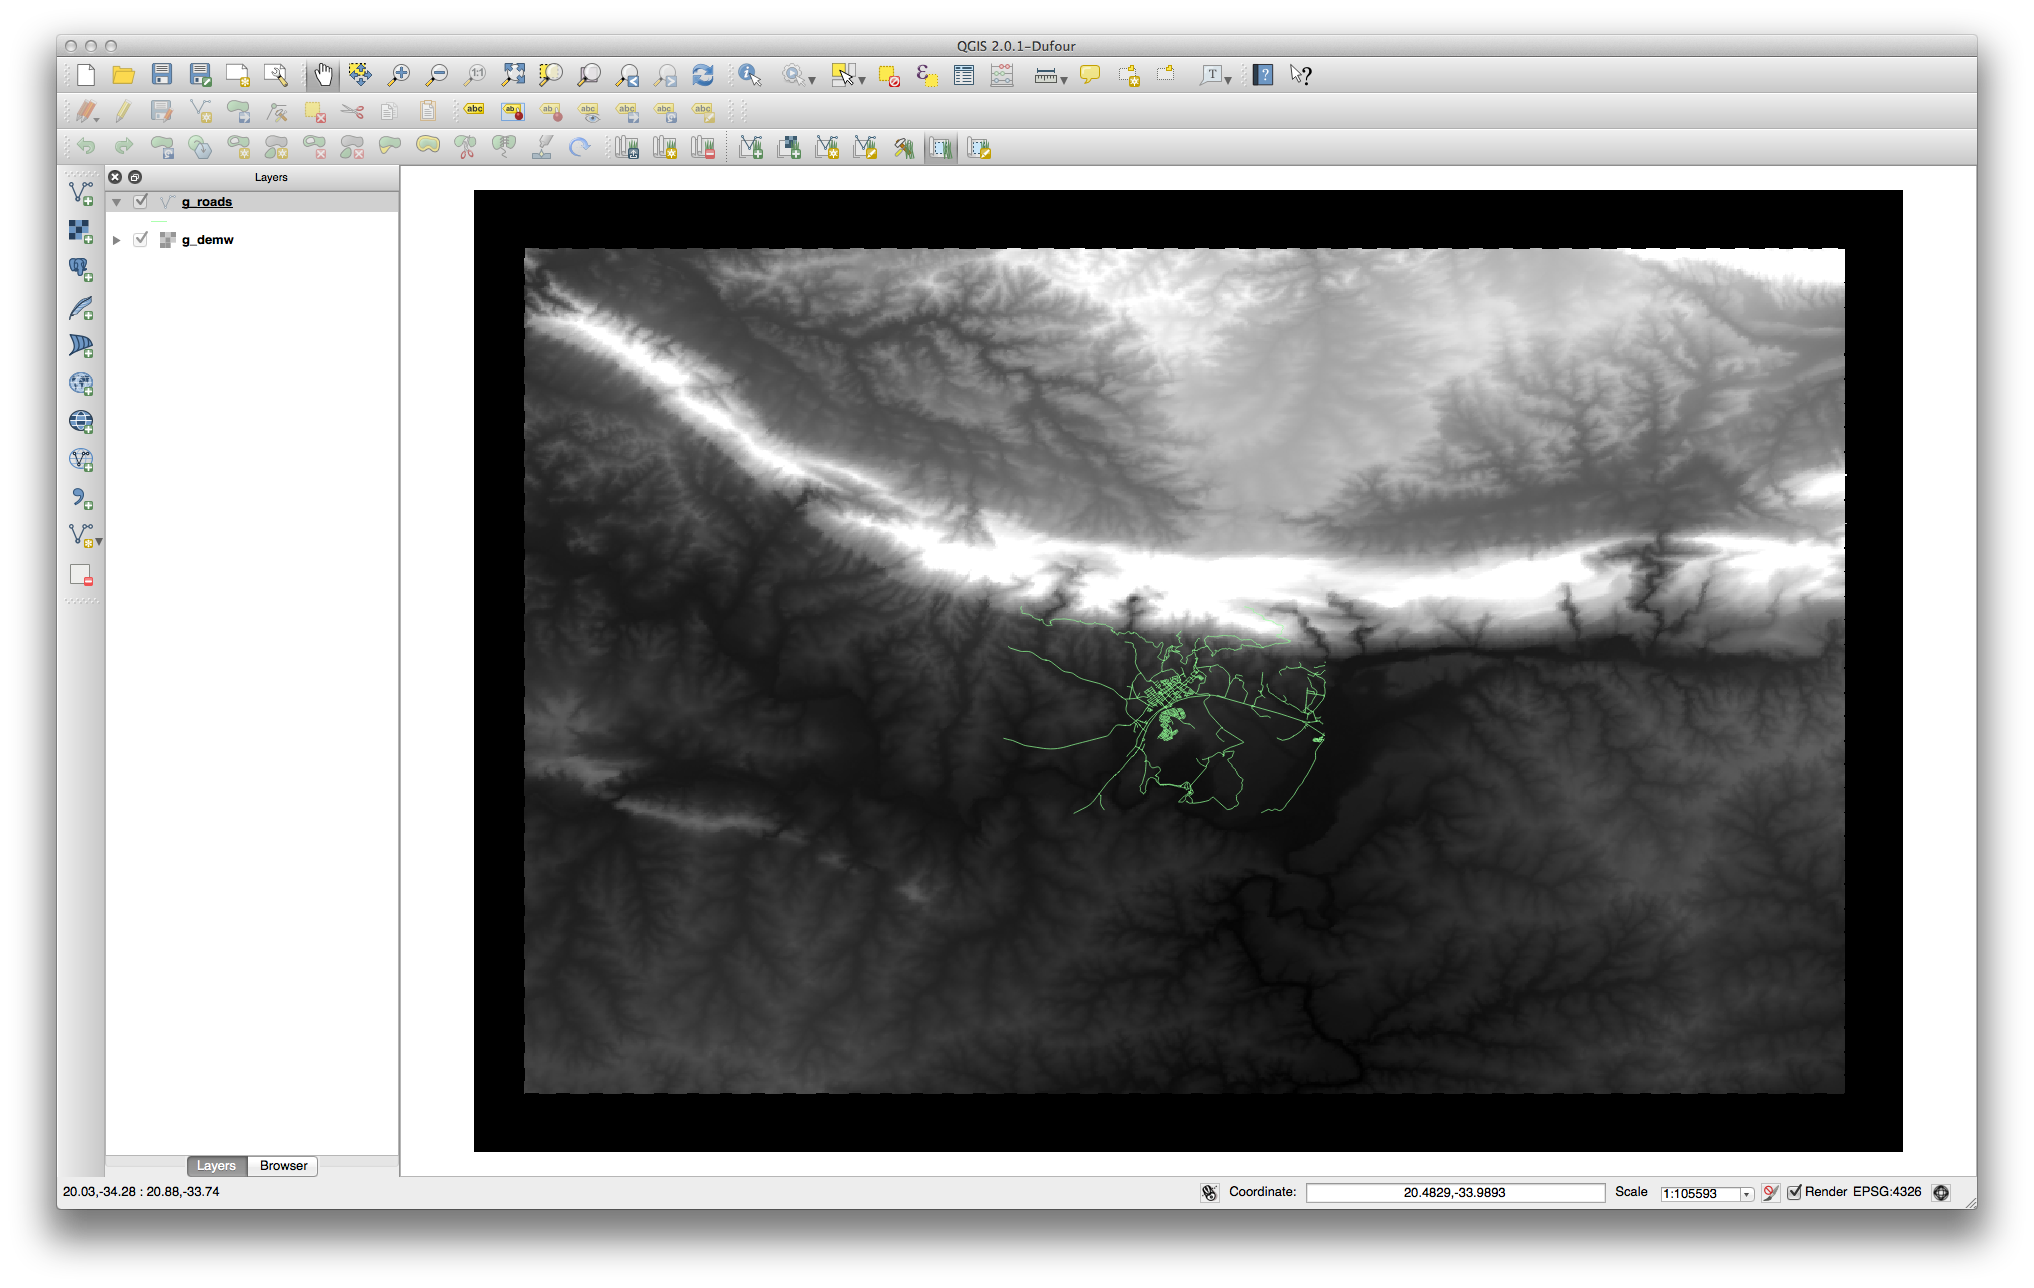
Nu heeft u alleen nog de geïmporteerde laag van GRASS weergegeven in uw kaart van QGIS.
13.1.3. Follow Along: Rastergegevens in GRASS laden
Recall that our DEM is in the Projected CRS UTM 33S / WGS 84, but our GRASS project is in the Geographic CRS WGS 84. So let’s re-project the DEM first.
Load the srtm_41_19.tif dataset (found under exercise_data/raster/SRTM/) into the QGIS map as usual, using QGIS’ Add Raster Layer tool.
Re-project it using GDAL Warp tool (Raster ‣ Projections ‣ Warp (Reproject)), setting it up as shown:
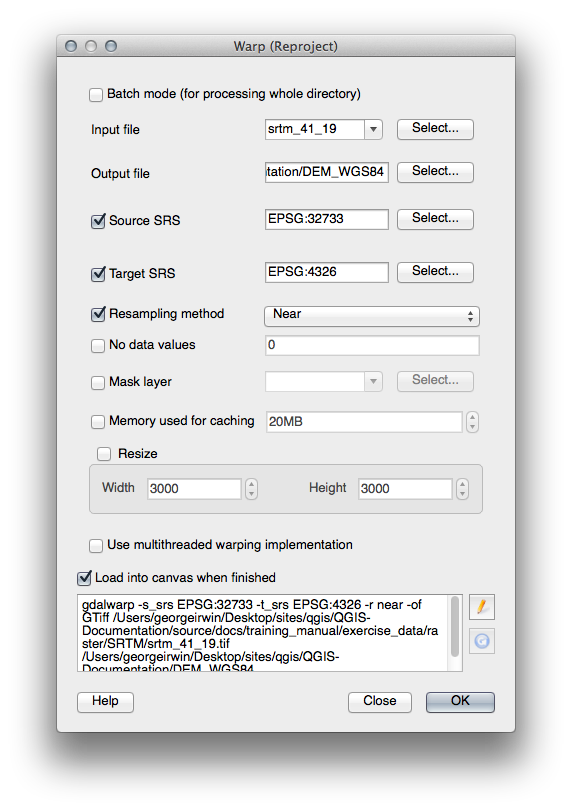
Save the raster under the same folder as the original, but with the file name DEM_WGS84.tif. Once it appears in your map, remove the srtm_41_19.tif dataset from your Layers list.
Now that it’s reprojected, you can load it into your GRASS database.
Open opnieuw het dialoogvenster GRASS-gereedschap.
Klik op de tab Moduleslijst.
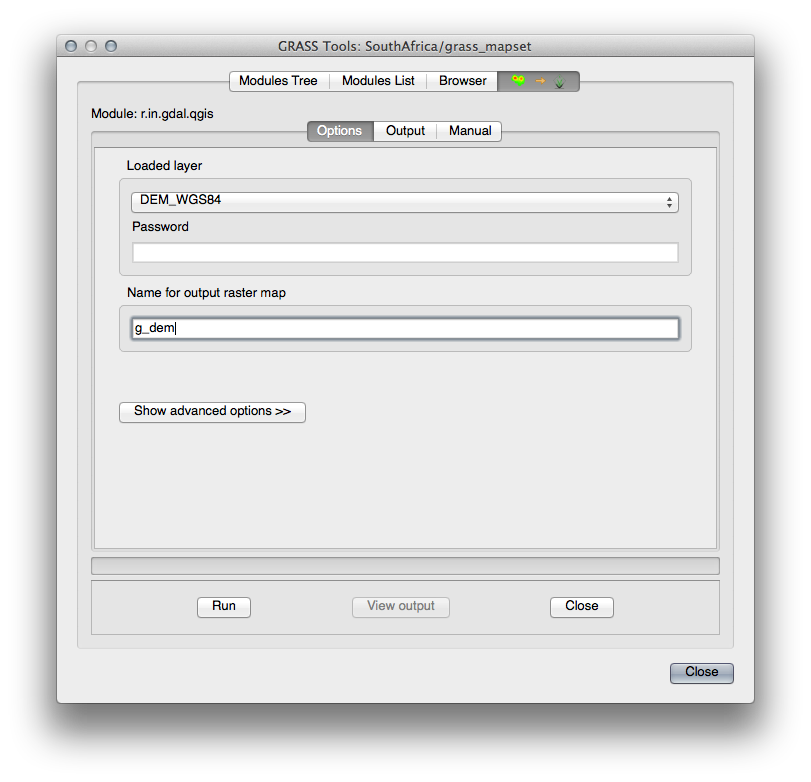
Search for r.in.gdal.qgis and double click the tool to open the tool’s dialog.
Set it up so that the input layer is DEM_WGS84 and the output is g_dem.
Klik op Uitvoeren.
Als het proces is voltooid, klik op Uitvoer bekijken.
Close de huidige tab en Close dan het gehele dialoogvenster.
You may now remove the original DEM_WGS84 layer.
13.1.4. In Conclusion
De werkstroom voor GRASS voor het binnenhalen van gegevens is enigszins anders dan de methode van QGIS omdat GRASS zijn gegevens in een ruimtelijke databasestructuur laad. Door echter QGIS als startpunt te gebruiken, kunt u het instellen van een mapset voor GRASS eenvoudiger maken door bestaande lagen in QGIS te gebruiken als gegevensbronnen voor GRASS.
13.1.5. What’s Next?
Nu de gegevens zijn geïmporteerd in GRASS kunen we kijken naar de geavanceerde analysebewerkingen die GRASS bied.