` `
座標取得プラグイン
座標入力プラグインは使いやすく、選択した2つの座標参照系(CRS)について地図キャンバスに座標を表示する機能を提供します。
座標取得プラグイン
- Start QGIS, select
 Project Properties from the
Settings (KDE, Windows) or File (Gnome, macOS) menu
and click on the Projection tab. As an alternative, you can also
click on the
Project Properties from the
Settings (KDE, Windows) or File (Gnome, macOS) menu
and click on the Projection tab. As an alternative, you can also
click on the  CRS status icon in the lower
right-hand corner of the status bar.
CRS status icon in the lower
right-hand corner of the status bar.  その場でCRS変換を有効にする チェックボックスをクリックし、プロジェクトの座標系を選択します( 投影法の利用方法 も参照)。
- Activate the coordinate capture plugin in the Plugin Manager (see
プラグインダイアログ) and ensure that the dialog is visible by going to
View ‣ Panels and ensuring that
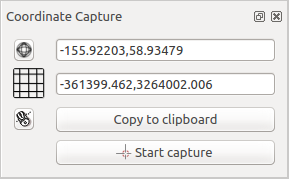
Coordinate Capture is enabled. The coordinate capture dialog
appears as shown in Figure figure_coordinate_capture. Alternatively,
you can also go to Vector ‣ Coordinate Capture and see
if Coordinate Capture is enabled.
 クリックすると座標を表示するためのCRSを選択できます アイコンをクリックし、上で選択したものとは異なるCRSを選択します。
- To start capturing coordinates, click on [Start capture]. You can now click anywhere on the map canvas and the plugin will show the coordinates for both of your selected CRS.
マウスの座標追跡を可能にするには、
 マウストラッキング アイコンをクリックして下さい.
選択した座標はクリップボードにコピーできます。