2.3. Lesson: Una inroduzione all’Interfaccia
Esploreremo l’interfaccia utente di QGIS in modo che tu avrai familiarità con i menu, le barre degli strumenti, l’area di mappa e la lista dei layer che formano la struttura di base dell’interfaccia.
Obiettivo per questa lezione: Capire le basi dell’interfaccia utente di QGIS
2.3.1.  Try Yourself: Le Basi
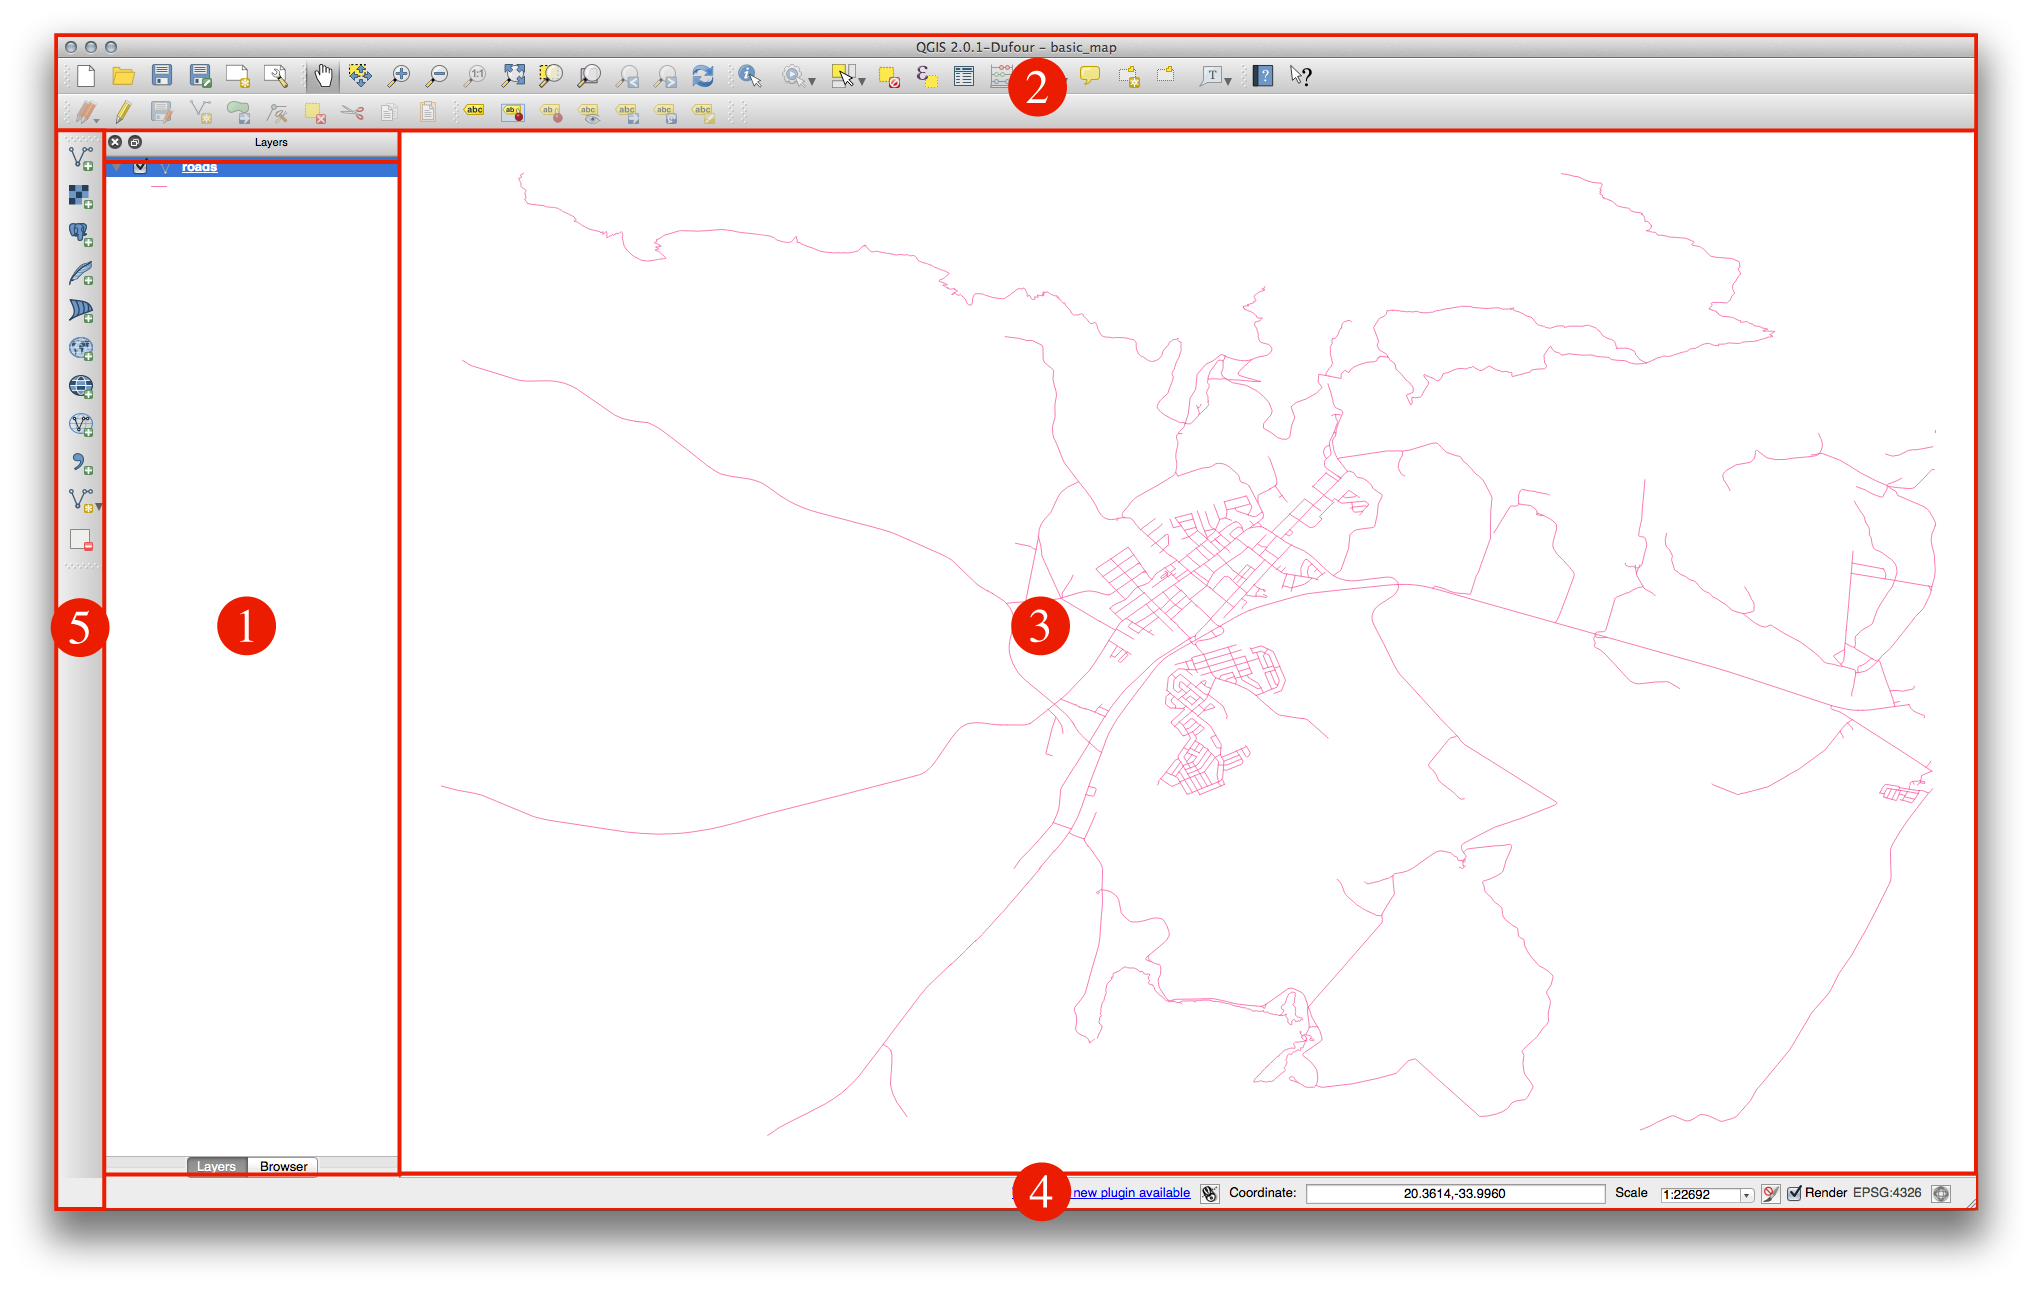
Gli elementi identificati nella figura sopra sono:
Lista dei Layer/ Pannello di navigazione
Strumenti
Area di mappa
Barra di Stato
Barra degli Strumenti Laterale
2.3.1.1. La Lista dei Layer
Nella Lista dei Layer, tu puoi vedere una lista, sempre, ti tutti i layer disponibili.
Espandere gli elementi ridotti (cliccando la freccia o il simbolo più a fianco ad essi) ti fornirà maggiori informazioni sull’aspetto attuale del layer.
Il click con il tasto destro su di un layer ti darà un menu con molte opzioni extra. Userai alcune di esse a breve, per cui dai uno sguardo!
Some versions of QGIS have a separate Control rendering order checkbox just underneath the Layers list. Don’t worry if you can’t see it. If it is present, ensure that it’s checked for now.
Nota
Un layer vettoriale è un dataset, di solito uno specifico tipo di oggetto, quali delle strade, degli alberi, ecc. Un layer vettoriale può essere fatto di punti, di linee o di poligoni.
2.3.1.2. Il Pannello di Navigazione
The QGIS Browser is a panel in QGIS that lets you easily navigate in your database. You can have access to common vector files (e.g. ESRI shapefile or MapInfo files), databases (e.g.PostGIS, Oracle, Spatialite or MSSQL Spatial) and WMS/WFS connections. You can also view your GRASS data.
2.3.1.3. Barre degli strumenti
Your most oft-used sets of tools can be turned into toolbars for basic access. For example, the File toolbar allows you to save, load, print, and start a new project. You can easily customize the interface to see only the tools you use most often, adding or removing toolbars as necessary via the Settings ‣ Toolbars menu.
Even if they are not visible in a toolbar, all of your tools will remain accessible via the menus. For example, if you remove the File toolbar (which contains the Save button), you can still save your map by clicking on the Project menu and then clicking on Save.
2.3.1.4. L’ Area di Mappa
This is where the map itself is displayed.
2.3.1.5. La Barra di Stato
Shows you information about the current map. Also allows you to adjust the map scale and see the mouse cursor’s coordinates on the map.
2.3.2. Try Yourself 1
Prova ad identificare i quattro elementi elencati sopra sul tuo scermi, senza far riferimento al diagramma sopra. Vedi se riesci ad identificare i loro nomi e le loro funzioni. Diventerai più familiare con questi elementi man mano che li userai nei prossimi giorni.
2.3.3. Try Yourself 2
Prova a trovare ciascuno di questi strumenti sul tuo schermi. Qual è il loro scopo?


Nota
Se alcuni di questi strumenti non sono visibili sullo schermo, prova ad abilitare alcune barre degli strumenti che al momento sono nascoste. Tieni anche in mente che se non c’è abbastanza spazio sullo schermo, una barra degli strumenti può essere accorciata nascondendo alcuni dei suoi strumenti. Puoi vedere gli strumenti nascosti cliccando sul bottone con la doppia freccia a destra, in ogni barra degli strumenti ridotta.
2.3.4. What’s Next?
Adesso che hai visto come lavora l’interfaccia di QGIS, puoi usare gli strumenti disponibili e cominciare ad apportare miglioramenti alla tua mappa! Questo è l’argomento della prossima lezione.