13.1. Lesson: Configuration de GRASS
Using GRASS in QGIS requires you to think of the interface in a slightly different way. Remember that you’re not working in QGIS directly, but working in GRASS via QGIS.
Le but de cette leçon : commencer un projet GRASS dans QGIS.
13.1.1.  Follow Along: Démarrer un nouveau projet GRASS
To launch GRASS from within QGIS, you need to activate it as with any other plugin. First, open a new QGIS project.
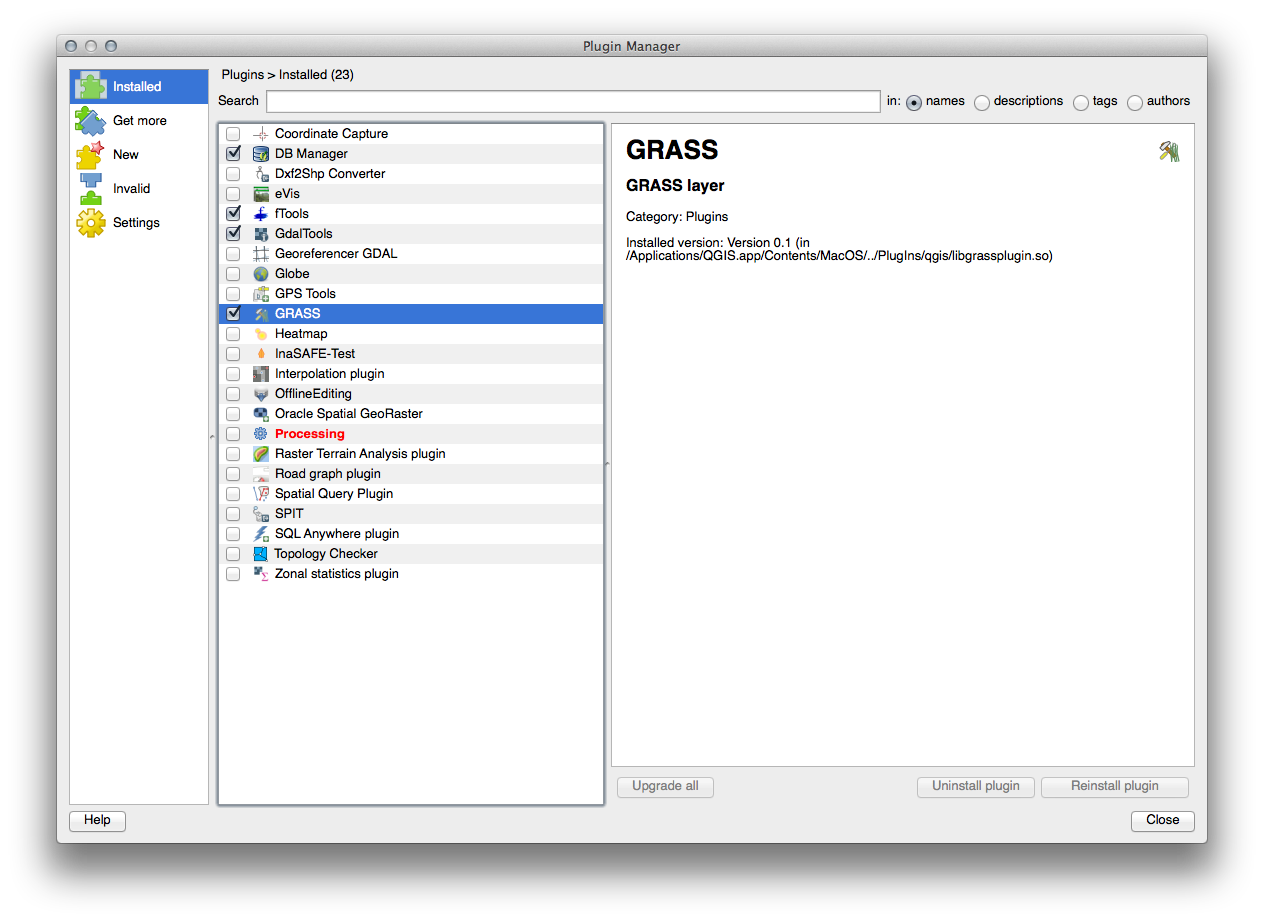
Dans le Gestionnaire d’extension, activez GRASS dans la liste :
The GRASS toolbar will appear:

Before you can use GRASS, you need to create a mapset. GRASS always works in a database environment, which means that you need to import all the data you want to use into a GRASS database.
Click on the New mapset button:

You’ll see a dialog explaining the structure of a GRASS mapset.
Create a new directory called grass_db in exercise_data.
Définissez le dossier qui sera utilisé par GRASS pour y placer sa base de donnée :
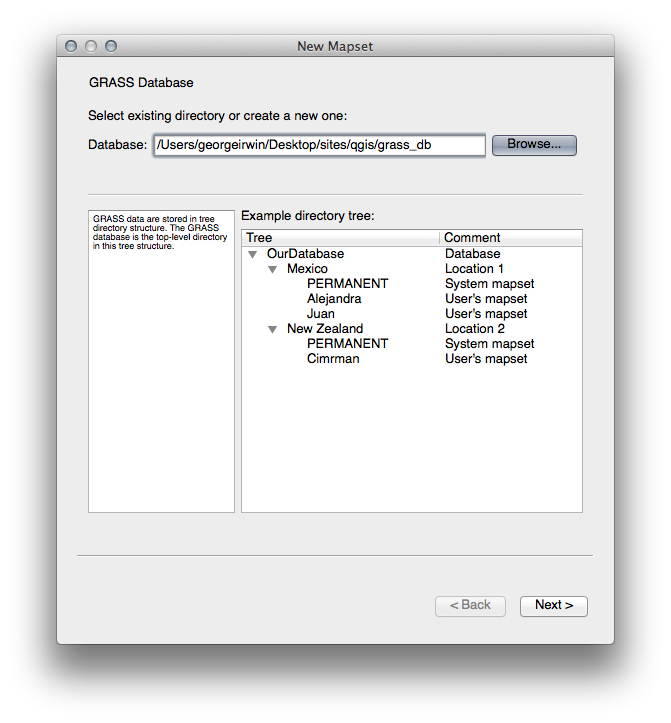
Cliquez sur Suivant
GRASS needs to create a “location”, which describes the maximum extents of the geographic area you’ll be working in.
Call the new location South_Africa:
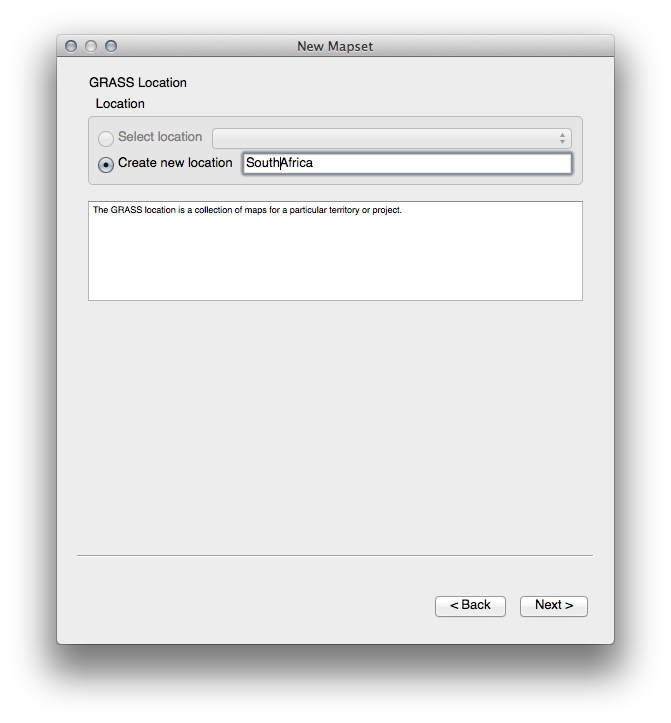
Cliquez sur Suivant
We’ll be working with WGS 84, so search for and select this CRS:
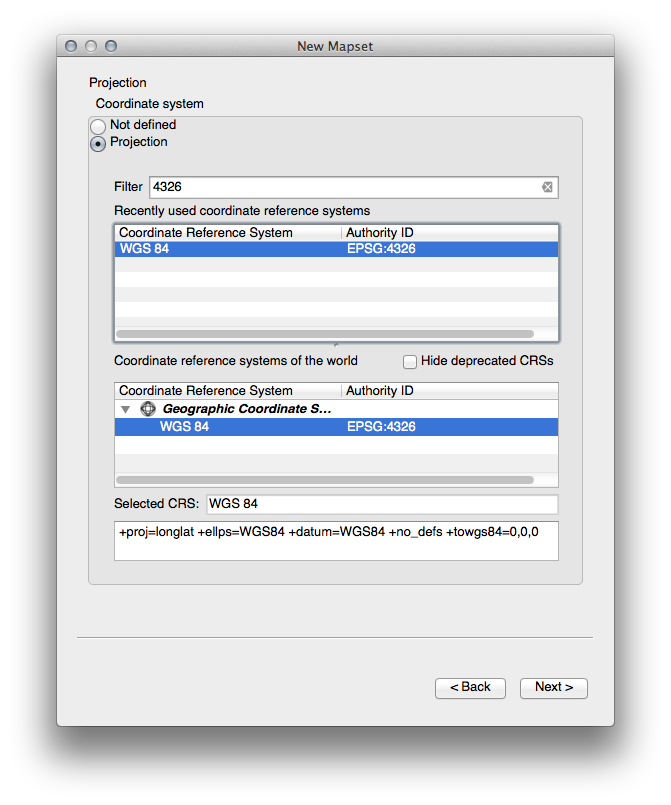
Cliquez sur Suivant
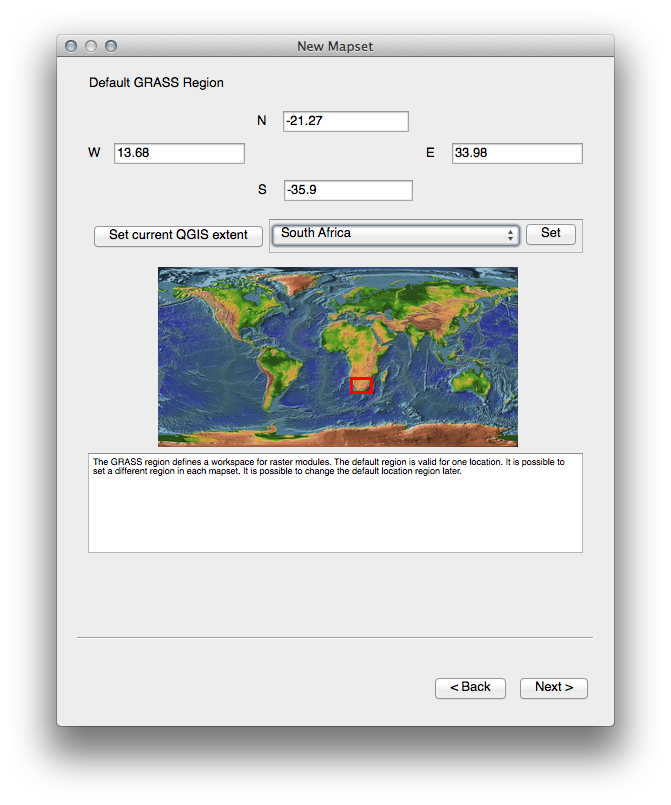
Maintenant, sélectionnez la région Afrique du Sud depuis la liste déroulante et cliquez sur Définir :
Cliquez sur Suivant
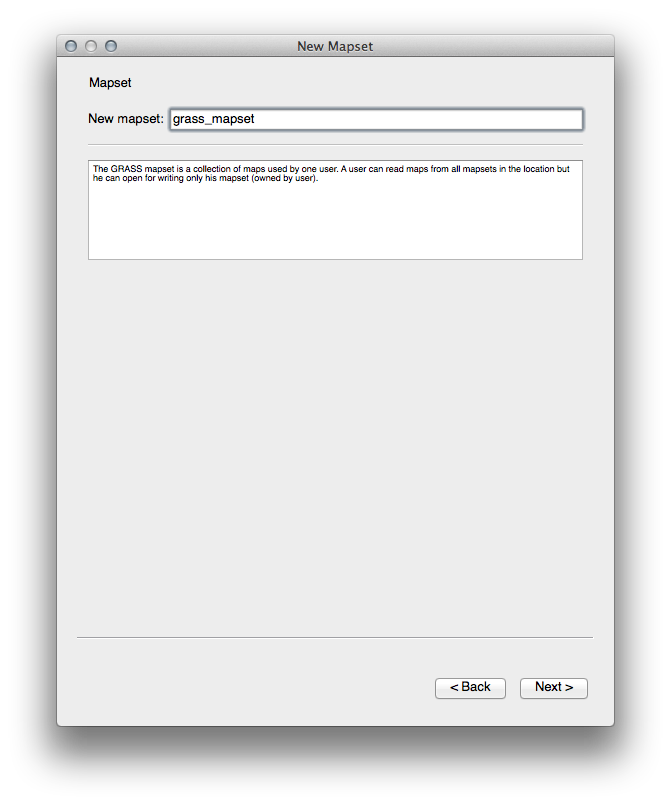
Créez un jeu de donnée, qui est le fichier sur lequel vous allez travailler.
Once you’re done, you’ll see a dialog asking you to confirm that the settings it displays are correct.
Cliquez sur Terminer.
Cliquez sur OK dans la fenêtre de succès.
13.1.2. Follow Along: Chargement des données vecteur dans GRASS
You’ll now have a blank map. To load data into GRASS, you need to follow a two-step process.
Load data into QGIS as usual. Use the roads.shp dataset (found under exercise_data/epsg4326/) for now.
As soon as it’s loaded, click on the GRASS Tools button:

In the new dialog, select Modules list.
Find the vector import tool by entering the term v.in.ogr.qgis in the Filter field.
The v stands for “vector”, in means its a function to import data into the GRASS database, ogr is the software library used to read vector data, and qgis means that the tool will look for a vector from among the vectors already loaded into QGIS.
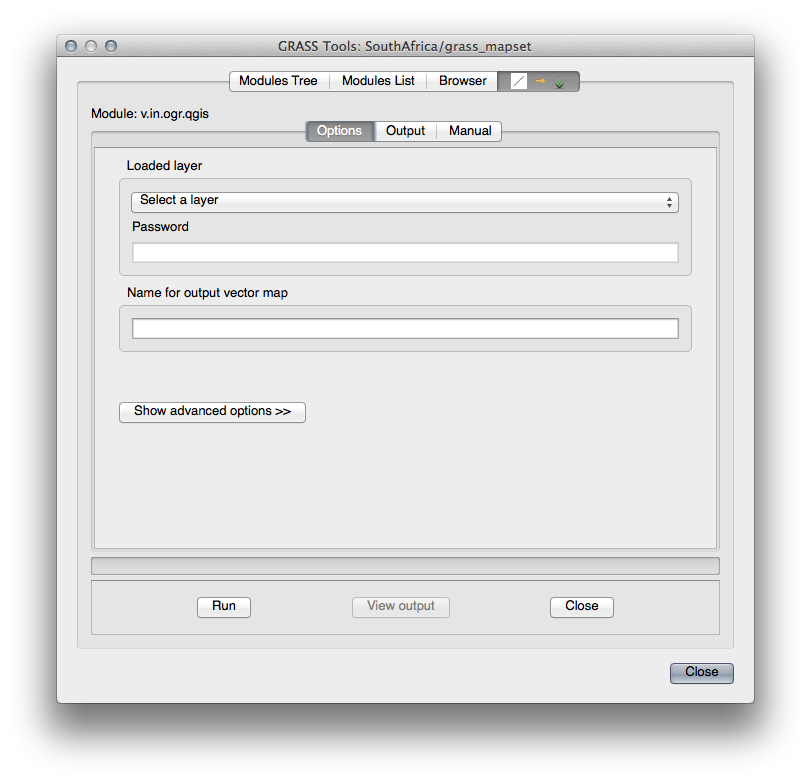
Once you’ve found this tool, click on it to bring up the tool itself:
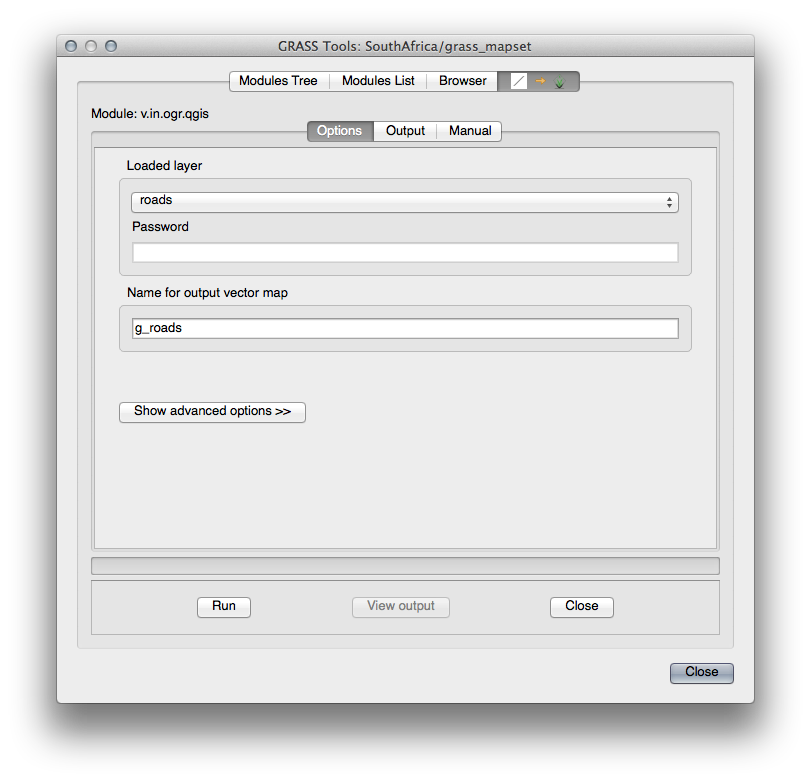
Set the loaded layer to roads and its GRASS version’s name to g_roads to prevent confusion.
Note
 Notez les options supplémentaires d’import fournies dans Options avancées. Cela inclut la possibilité d’ajouter une clause WHERE pour la requête SQL utilisée lors de l’import de donnée.
Cliquez sur Exécuter pour commencer l’import.
Une fois fait, cliquez sur le bouton Voir le résultat pour voir la nouvelle couche GRASS importée dans la carte.
Fermez d’abord l’outil d’import (cliquez sur le bouton Fermer juste à droite de Voir le résultat), puis fermez la fenêtre Outils GRASS.
- Remove the original roads layer.
Vous ne disposez désormais plus que de la couche GRASS affichée dans la carte QGIS.
13.1.3. Follow Along: Chargement des données Raster dans GRASS
Recall that our DEM is in the Projected CRS UTM 33S / WGS 84, but our GRASS project is in the Geographic CRS WGS 84. So let’s re-project the DEM first.
Load the srtm_41_19.tif dataset (found under exercise_data/raster/SRTM/) into the QGIS map as usual, using QGIS’ Add Raster Layer tool.
Re-project it using GDAL Warp tool (Raster ‣ Projections ‣ Warp (Reproject)), setting it up as shown:
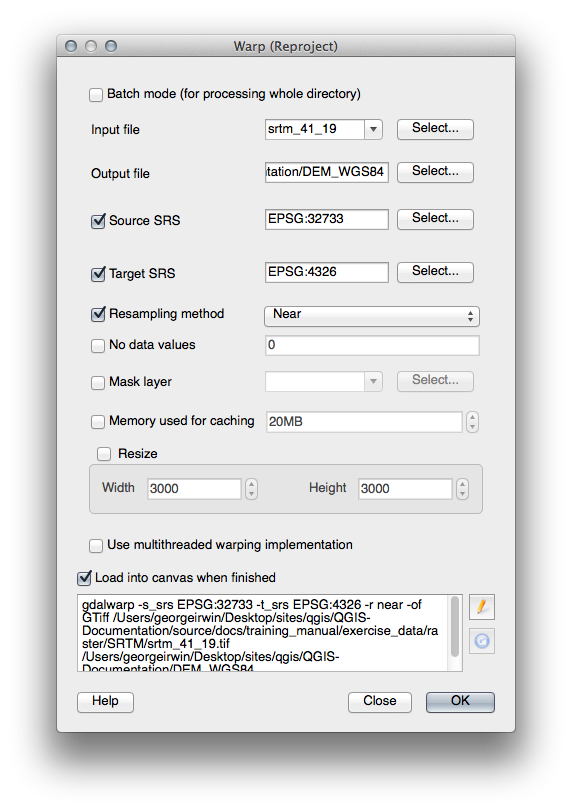
Save the raster under the same folder as the original, but with the file name DEM_WGS84.tif. Once it appears in your map, remove the srtm_41_19.tif dataset from your Layers list.
Now that it’s reprojected, you can load it into your GRASS database.
Ouvrez à nouveau les Outils GRASS.
Cliquez sur l’onglet Liste des modules.
Search for r.in.gdal.qgis and double click the tool to open the tool’s dialog.
Set it up so that the input layer is DEM_WGS84 and the output is g_dem.
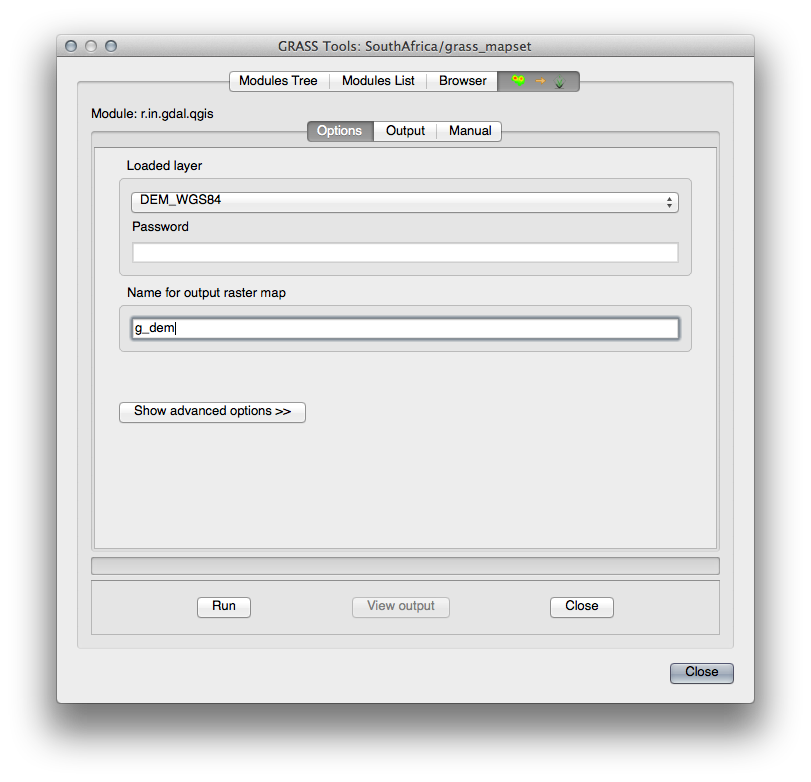
Cliquez sur Exécuter.
Une fois l’opération réussie, cliquez sur Voir le résultat.
Vous pouvez Fermer l’onglet actuel puis cliquez dans la boîte de dialogue suivante sur Fermer.

You may now remove the original DEM_WGS84 layer.
13.1.4. In Conclusion
La méthode de travail de GRASS pour la gestion des données est quelque peu différente de celle de QGIS car GRASS les charge dans une base de donnée à structure spatiale. Toutefois, en utilisant QGIS comme interface, vous pouvez rendre plus facile la création d’un jeu de donnée GRASS grâce aux couches QGIS comme sources de données pour GRASS.
13.1.5. What’s Next?
Maintenant que les données sont importées dans GRASS, nous pouvons nous intéresser aux opérations d’analyses plus évoluées que nous permet GRASS.