` `
Complemento Captura de coordenadas
El complemento de captura de coordenadas es fácil de usar y proporciona la capacidad de mostrar coordenadas en la vista del mapa para dos sistemas de referencia de coordenadas (SRC).
Complemento Captura de coordenadas
- Start QGIS, select
 Project Properties from the
Settings (KDE, Windows) or File (Gnome, macOS) menu
and click on the Projection tab. As an alternative, you can also
click on the
Project Properties from the
Settings (KDE, Windows) or File (Gnome, macOS) menu
and click on the Projection tab. As an alternative, you can also
click on the  CRS status icon in the lower
right-hand corner of the status bar.
CRS status icon in the lower
right-hand corner of the status bar. Pulse en la casilla de verificación
 Activar transformación de SRC al vuelo y seleccione un sistema de coordenadas proyectadas de su elección (vea también Trabajar con Proyecciones)
- Activate the coordinate capture plugin in the Plugin Manager (see
El diálogo de complementos) and ensure that the dialog is visible by going to
View ‣ Panels and ensuring that
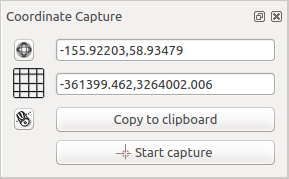
Coordinate Capture is enabled. The coordinate capture dialog
appears as shown in Figure figure_coordinate_capture. Alternatively,
you can also go to Vector ‣ Coordinate Capture and see
if Coordinate Capture is enabled.
Haga clic en el icono
 Pulse para seleccionar el SRC a usar para la visualización de coordenadas y elija un SRC diferente al que seleccionó anteriormente.
- To start capturing coordinates, click on [Start capture]. You can now click anywhere on the map canvas and the plugin will show the coordinates for both of your selected CRS.
Para habilitar el seguimiento de coordenadas del ratón, pulse el icono
 Seguimiento del ratón.
También se pueden copiar las coordenadas seleccionadas al portapapeles.